Introduction
A computer troubleshooting guide is one of the most valuable resources for anyone who uses a computer daily. Whether you are a home user, a student, or a small business owner, computer problems can appear unexpectedly and disrupt your work, productivity, and focus. Issues like slow performance, system crashes, internet failures, or software errors often feel complex, but in reality, many of them have simple and logical solutions.
This computer troubleshooting guide is created to help you understand how computer problems occur, how to identify their root causes, and how to fix them step by step. Instead of relying on guesswork or random fixes, this guide follows a structured troubleshooting approach used by IT professionals. By applying these methods, you can resolve issues faster, avoid unnecessary repairs, and protect your data.
Research shows that more than 70% of common computer problems are caused by software issues, not hardware failure. This includes outdated operating systems, conflicting applications, malware infections, and system misconfigurations. A well-written computer troubleshooting guide allows users to fix these problems without replacing expensive components or visiting a repair shop.http://bestbuygeeksquads.com
Why a Computer Troubleshooting Guide Is Important
When a computer starts acting strangely, most users immediately panic or try multiple fixes at once. This often leads to:
- Making unnecessary system changes
- Installing unsafe third-party tools
- Ignoring the actual cause of the problem
A proper computer troubleshooting guide removes confusion by following a logical process. It starts with basic checks and moves toward advanced solutions only when needed. This reduces risk and increases the chance of fixing the issue correctly the first time.
Benefits of using a structured computer troubleshooting guide include:
- Faster problem diagnosis
- Reduced downtime and frustration
- Lower repair and maintenance costs
- Improved system performance and stability
- Better understanding of how your computer works
Who This Computer Troubleshooting Guide Is For
This guide is written in simple, easy-to-read language, making it ideal for:
- Beginners with little technical knowledge
- Home users dealing with everyday computer issues
- Students and remote workers
- Small business owners managing their own computers
At the same time, the guide provides in-depth technical explanations and professional troubleshooting techniques, making it valuable for intermediate users who want to strengthen their troubleshooting skills.
“Good troubleshooting is not about quick fixes—it’s about identifying the root cause and applying the right solution.”
— IT Support Best Practice
What You Will Learn From This Computer Troubleshooting Guide
By following this complete computer troubleshooting guide, you will learn how to:
- Identify common computer problems and their symptoms
- Apply a step-by-step troubleshooting checklist
- Fix slow computers, crashes, and startup issues
- Troubleshoot internet and software-related problems
- Prevent future issues through proper maintenance
This guide follows a progressive troubleshooting structure, starting with basic concepts and moving toward advanced solutions. Each section builds on the previous one, ensuring clarity, safety, and effectiveness throughout the troubleshooting process.
What Is Computer Troubleshooting?
Computer troubleshooting is the systematic process of identifying, analyzing, and fixing problems that prevent a computer from working properly. Instead of guessing or applying random solutions, troubleshooting follows a logical sequence to find the root cause of an issue and resolve it safely and efficiently.
In simple terms, computer troubleshooting means asking the right questions:
- What exactly is not working?
- When did the problem start?
- What changed before the issue appeared?
- Is the problem caused by software, hardware, or user error?
A professional computer troubleshooting guide always begins with observation and diagnosis before moving on to solutions. This approach reduces the risk of data loss and prevents unnecessary repairs.
Troubleshooting vs Computer Repair
Many people confuse troubleshooting with repair, but they are not the same.
| Aspect | Computer Troubleshooting | Computer Repair |
|---|---|---|
| Purpose | Identify and diagnose the issue | Fix or replace faulty parts |
| Focus | Finding the root cause | Applying a physical or software solution |
| Cost | Often free or low-cost | Can be expensive |
| Risk | Low when done correctly | Higher if hardware is involved |
A strong computer troubleshooting guide helps users determine whether a problem can be fixed through settings, updates, or software changes—or if professional repair is truly required.
Common Problems Solved Through Computer Troubleshooting
Most computer issues fall into predictable categories. According to IT service data, the most frequent problems include:
- Slow computer performance
- System freezing or crashing
- Applications not opening or responding
- Internet or Wi-Fi connectivity issues
- Startup and boot problems
The good news is that the majority of these problems are software-related and can be resolved using basic troubleshooting techniques outlined in this guide.
Why a Step-by-Step Computer Troubleshooting Guide Works
Random fixes often waste time and make problems worse. A step-by-step computer troubleshooting guide works because it:
- Eliminates possible causes one by one
- Starts with the safest and simplest checks
- Reduces unnecessary system changes
- Provides clear decision points for next steps
Fact: IT professionals solve problems faster not because they know every fix, but because they follow a consistent troubleshooting process.
The Core Principles of Computer Troubleshooting
Effective computer troubleshooting is built on a few key principles:
- Start simple: Always check power, connections, and basic settings first
- Change one thing at a time: This helps you identify what actually fixes the problem
- Document results: Note what works and what doesn’t
- Avoid assumptions: Similar symptoms can have different causes
- Stop when risk increases: Know when to seek professional help
By following these principles, even non-technical users can troubleshoot computer problems confidently and safely.
Basic Computer Troubleshooting Checklist (Start Here)
Before diving into complex fixes, every computer troubleshooting guide should begin with a basic checklist. These simple steps resolve a surprisingly large number of computer problems. IT support reports show that nearly 40% of issues are fixed by basic troubleshooting alone, without advanced tools or repairs.
This checklist is designed to be safe, fast, and effective. Always complete these steps before attempting deeper troubleshooting.
1. Restart Your Computer
Restarting your computer clears temporary memory (RAM), stops stuck background processes, and reloads system services. Many performance and freezing issues occur because programs remain active for too long.
Why restarting works:
- Clears system cache
- Stops memory leaks
- Applies pending updates
- Resets system services
Tip: If your computer is frozen, perform a safe restart by holding the power button for 5–10 seconds.
2. Check Power Supply and Cables
Power-related issues are often overlooked. A loose cable or faulty outlet can cause startup failures, random shutdowns, or screen flickering.
Things to check:
- Power cable securely connected
- Laptop charger indicator light
- Power strip or surge protector
- Wall outlet functionality
Fact: Faulty power connections are among the top causes of computers not turning on.
3. Disconnect External Devices
External devices like USB drives, printers, webcams, and external hard drives can interfere with startup and system performance.
Disconnect temporarily:
- USB flash drives
- External hard disks
- Printers and scanners
- Docking stations
Then restart the computer and check if the issue persists.
4. Check Internet Connection
Internet-related issues can appear as software failures or slow performance. Before troubleshooting applications, verify your network connection.
Quick checks:
- Wi-Fi or Ethernet connected
- Airplane mode disabled
- Router and modem powered on
- Try opening multiple websites
If websites don’t load, the issue may be network-related rather than a computer problem.
5. Update Your Operating System
Outdated operating systems often cause compatibility problems, security risks, and performance issues.
Benefits of system updates:
- Bug fixes
- Security patches
- Improved performance
- Driver updates
Keeping your OS updated is a core recommendation in every professional computer troubleshooting guide.
6. Run Built-In Diagnostic Tools
Modern operating systems include built-in tools designed to identify common problems.
Examples include:
- Windows Troubleshooter
- macOS Diagnostics
- Disk check utilities
- Memory diagnostic tools
These tools automatically detect issues and often suggest fixes, saving time and effort.
Basic Troubleshooting Checklist Summary
| Step | Purpose |
|---|---|
| Restart system | Clear memory and reset processes |
| Check power | Fix startup and shutdown issues |
| Remove external devices | Identify hardware conflicts |
| Verify internet | Isolate network problems |
| Update OS | Resolve bugs and security issues |
| Run diagnostics | Detect system errors |
Completing this checklist first ensures that you don’t waste time on advanced fixes when the solution is simple.
Computer Won’t Turn On – Troubleshooting Guide
When a computer won’t turn on, it can feel alarming, especially if important work or data is stored on the system. However, this is a common issue, and in many cases, the cause is simple. A structured computer troubleshooting guide helps you identify whether the problem is related to power, hardware, or system failure—without jumping to expensive conclusions.
Common Reasons a Computer Won’t Turn On
Understanding the possible causes makes troubleshooting faster and safer. The most common reasons include:
- Power supply problems: Faulty cables, damaged adapters, or dead power outlets
- Battery issues (laptops): Completely drained or failing batteries
- Loose internal connections: RAM or storage not seated properly
- Faulty power button: Especially common in older laptops
- Motherboard or hardware failure: Less common, but possible
Fact: According to repair statistics, over 50% of “computer won’t turn on” cases are caused by power-related issues—not hardware failure.
Step-by-Step Computer Troubleshooting Guide for Startup Issues
Follow these steps in order. Stop once the issue is resolved.
1. Check Power Source and Cables
- Try a different wall outlet
- Replace the power cable or charger if possible
- Remove surge protectors temporarily
For laptops, check if the charging light turns on when plugged in.
2. Perform a Power Reset
Power resets clear residual electricity that may block startup.
Steps:
- Turn off the computer
- Unplug all cables
- Remove the battery (if removable)
- Hold the power button for 15–20 seconds
- Reconnect power and turn the computer on
This simple step solves many startup problems.
3. Look for Signs of Life
Pay attention to indicators:
- Fan noise
- LED lights
- Beeping sounds
- Screen flicker
These signs help identify whether the issue is with the display, power, or internal components.
4. Test the Display
Sometimes the computer is running, but nothing appears on the screen.
Troubleshooting steps:
- Increase screen brightness
- Connect to an external monitor
- Check display cables (for desktops)
If the external display works, the issue is likely the laptop screen or cable.
5. Check Internal Hardware (Advanced Users Only)
If you are comfortable opening your system:
- Reseat RAM modules
- Check storage connections
- Remove dust buildup
⚠️ Caution: If you are unsure, skip this step to avoid damage.
When to Stop Troubleshooting
Stop troubleshooting and seek professional help if:
- You smell burning or see sparks
- The system shows no power signs at all
- The motherboard or power supply appears damaged
Continuing at this point can cause permanent damage.
Quick Startup Troubleshooting Table
| Symptom | Likely Cause | Solution |
|---|---|---|
| No lights or sound | Power issue | Check cable, outlet |
| Lights on, no display | Display issue | Test external monitor |
| Repeated beeps | Hardware error | Check RAM |
| Shuts off immediately | Overheating or PSU | Power reset |
A computer troubleshooting guide always prioritizes safety. If basic steps don’t work, it’s better to pause than risk data loss or hardware damage.
Slow Computer Performance – How to Troubleshoot
A slow computer is one of the most common complaints among users, and it’s a major reason people search for a reliable computer troubleshooting guide. Sluggish performance can affect productivity, increase frustration, and make even simple tasks feel exhausting. The good news is that slow computers are usually caused by software-related issues, not permanent hardware damage.
Studies show that over 60% of slow computer problems are caused by background processes, outdated software, or storage limitations. With the right troubleshooting steps, most systems can be restored to acceptable performance.
Why Is My Computer So Slow?
Before fixing the problem, it’s important to understand the root cause. Common reasons include:
- Too many startup programs running at boot
- Low available RAM
- Nearly full hard drive or SSD
- Malware or unwanted background software
- Outdated operating system or drivers
- Overheating due to dust or blocked vents
A professional computer troubleshooting guide always starts by identifying which of these factors is affecting the system.
Step-by-Step Computer Troubleshooting Guide for Slow Performance
1. Check Startup Programs
Many applications automatically start when your computer boots, consuming memory and CPU power.
Troubleshooting steps:
- Open Task Manager (Windows) or Activity Monitor (Mac)
- Review startup applications
- Disable non-essential programs
Fact: Disabling unnecessary startup apps can improve boot time by up to 30%.
2. Free Up Disk Space
Low storage space slows system operations, updates, and temporary file handling.
What to remove safely:
- Temporary files
- Old downloads
- Unused applications
- Recycle bin contents
Tip: Keep at least 20% of your drive free for optimal performance.
3. Check RAM and System Usage
Insufficient memory forces the system to rely on slower virtual memory.
How to troubleshoot:
- Monitor RAM usage during normal tasks
- Close memory-heavy applications
- Consider upgrading RAM if usage is consistently high
| RAM Usage | System Condition |
|---|---|
| Below 60% | Healthy |
| 60–80% | Moderate load |
| Above 80% | Performance risk |
4. Scan for Malware and Unwanted Software
Malware runs silently in the background, consuming system resources.
Best practices:
- Run a full antivirus scan
- Use reputable malware removal tools
- Remove browser extensions you don’t recognize
Case Study: Systems infected with adware showed a 45% performance drop until malware removal was completed.
5. Update Your System and Drivers
Outdated software can cause inefficiencies and compatibility issues.
Updates improve:
- Speed and stability
- Security
- Hardware compatibility
Keeping software current is a core principle in any computer troubleshooting guide.
6. Check for Overheating
Overheating causes systems to throttle performance to prevent damage.
Signs of overheating:
- Loud fan noise
- Sudden slowdowns
- Unexpected shutdowns
Fixes include:
- Cleaning vents
- Using cooling pads (laptops)
- Ensuring proper airflow
Quick Performance Troubleshooting Table
| Problem | Likely Cause | Solution |
|---|---|---|
| Slow boot | Too many startup apps | Disable startup programs |
| Lag during tasks | Low RAM | Close apps or upgrade |
| Freezing | Overheating | Improve cooling |
| Constant slowdown | Malware | Run security scans |
Preventing Slow Computer Performance
To avoid future slowdowns:
- Restart your computer weekly
- Keep storage space free
- Update software regularly
- Avoid installing unnecessary programs
A structured computer troubleshooting guide doesn’t just fix problems—it helps prevent them.
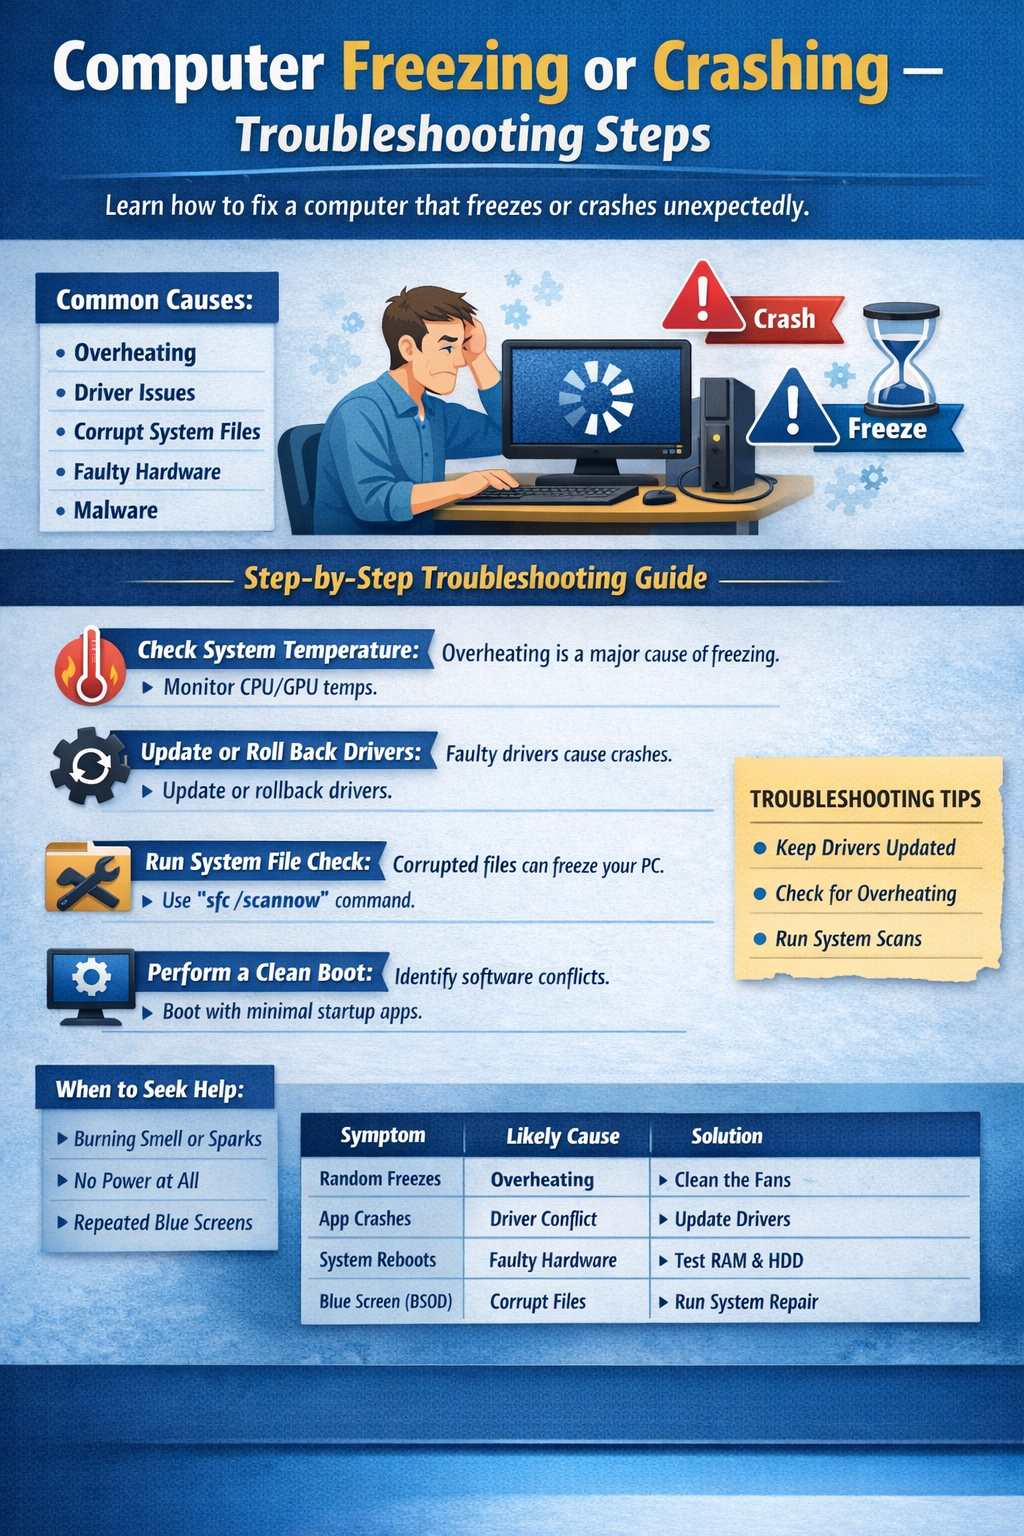
Computer Freezing or Crashing – Troubleshooting Steps
When a computer freezes or crashes unexpectedly, it can interrupt work, cause data loss, and damage system stability over time. Freezing usually means the system stops responding, while crashing often results in forced restarts or error messages. A reliable computer troubleshooting guide treats these issues seriously because they are early warning signs of deeper system problems.
According to system reliability reports, frequent freezing and crashes are most commonly caused by overheating, driver conflicts, or corrupted system files—not immediate hardware failure.
Common Causes of Computer Freezing and Crashing
Understanding the cause helps narrow down the solution. The most common reasons include:
- Overheating CPU or GPU
- Outdated or faulty drivers
- Software conflicts between applications
- Corrupted system files
- Failing hardware components (RAM, hard drive)
- Malware or background system overload
A professional computer troubleshooting guide always aims to identify which of these factors is responsible before applying fixes.
Step-by-Step Computer Troubleshooting Guide for Freezing Issues
1. Check System Temperature
Overheating is one of the top causes of freezing and crashes.
How to troubleshoot:
- Listen for loud or constantly running fans
- Feel excessive heat near vents
- Use system monitoring tools to check CPU temperature
Safe temperature ranges:
- Idle: 35–50°C
- Under load: up to 80°C
If temperatures exceed safe limits, performance throttling or crashes will occur.
2. Update or Roll Back Drivers
Drivers allow hardware and software to communicate. Faulty drivers can cause system instability.
Troubleshooting steps:
- Update drivers through Device Manager or official websites
- Roll back recently updated drivers if freezing started afterward
Fact: Graphics driver conflicts account for a significant percentage of random system crashes.
3. Run System File Checks
Corrupted system files can cause programs or the entire system to freeze.
Common tools include:
- System File Checker (Windows)
- Disk Utility First Aid (macOS)
These tools scan and repair damaged system components automatically.
4. Perform a Clean Boot
A clean boot starts the system with only essential services.
Benefits of clean boot troubleshooting:
- Identifies software conflicts
- Isolates problematic applications
- Improves system stability
If freezing stops after a clean boot, one of the disabled programs is likely the cause.
5. Test Hardware Components
If software fixes fail, hardware testing may be necessary.
Basic checks include:
- Memory diagnostic tests
- Hard drive health scans
- Checking error logs
Case Study: Systems with faulty RAM showed repeated freezing until memory modules were replaced.
Quick Freezing & Crashing Troubleshooting Table
| Symptom | Likely Cause | Recommended Fix |
|---|---|---|
| Random freezes | Overheating | Clean vents, improve airflow |
| App crashes | Corrupt software | Reinstall application |
| System restarts | Driver issue | Update or roll back drivers |
| Blue screen | Hardware or OS issue | Run diagnostics |
Preventing Freezes and Crashes
To maintain system stability:
- Keep drivers updated
- Monitor temperatures regularly
- Avoid running too many heavy applications at once
- Perform regular system scans
A well-maintained system follows the principles of a professional computer troubleshooting guide and experiences fewer crashes over time.